Thursday, October 19, 2023

Bedroom turned office renovation

Pin It

Our last son moved out on his own about six months ago. About two days later I started converting his bedroom into an office. Why so soon? Well I was using a small bedroom as my office and it was dark during the day and late afternoon the sun shined into the only window making it hard for me to work on my computer. Well and probably the fact that I just hadn't refreshed a room in awhile and I was itching to do so! My goal was, however, to keep the budget down and 'use what I had' and so I set out to do just that!

I kept the white/light paint that my son had used on the main walls and then used leftover black paint (used in our family room) for the 'focal' wall. Because this room has picture windows in front as well as a side window and is in the front of our house, it gets a LOT of sun and light. However I didn't want just a painted focal wall so started researching trimmed out focal walls. 

I found tons of great ideas and love to gather all the ideas and then 'do my own thing' as it were. Which is exactly what I did with this. While most would have mathematically figured out how to install the trim I didn't. Believe me I tried! Math is not my thing and since the trim was 1-1/4" wide it was difficult. So I decided to keep 3" between trim pieces and started cutting with absolutely no rhyme or reason just until it look 'right' in my eyes.


Used 1-1/4" MDF trim


Used the old fashioned mitre box since I was cutting MDF. Saved me hiking to and from the garage to use my mitre saw.


Cutting trim, taping, and placing on wall.


Brad nailed all trim in place and painted to match base color.


For the main walls, I kept the light 'green' paint that my son had used. Not normally a white wall person but for some reason I felt like keeping it. Maybe I just didn't have the energy to paint the whole thing!


Completed bedroom to office conversion for less than $200.


Linking up today at:


#1951renovation
#focalwall
#blackwalls

Friday, October 6, 2023

Paths are never straight and narrow

And mine is no exception. For the past four summers living at this house I have been pondering what to do with the path the is in my back garden.

This path was inherited and took shape as I cleared out the trash and the area and sort of just came to be. While I liked having a path through the area, I just never really knew what to do with. It is surrounded by trees (walnut trees to be exact) so in the fall LOTS of walnuts, and leaves drop back there which makes the hard surface decision difficult. I didn't want anything that would blow away with the leaf blowers and rakes, didn't want anything that would stain from the walnuts, you get the picture.

But nothing usually results in something, namely weeds. So I started filling in with random pavers and some Quik Crete poured step stones just to keep the weeds down. Until one day, my husband and I were at an estate sale and I noticed a pile of bricks that was covered in dirt and surrounded by weeds. Asked the estate people if they were for sale. Honestly? I don't think they had even realized the bricks were there so they gave me a price of .20 cents per brick. These were not just any bricks but old road bricks! I was so excited and we piled as many as we could in the back of my suv.

The following spring my boys and husband started installing the bricks in the pattern I wanted as my Mothers Day gift. I was so excited and absolutely LOVE how it turned out!


Metropolitan road bricks! A piece of local history.


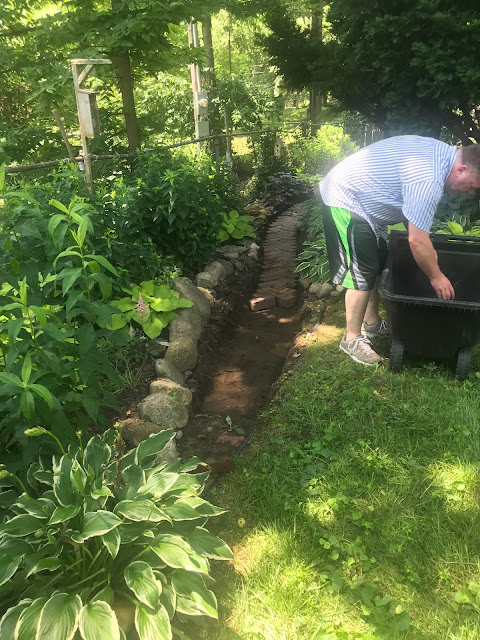
We started by removing the misc bricks, stones, pavers that I had been collecting. Then we dug out a trench to hold the bricks in place. We did not put sand or landscape fabric or anything underneath. Honestly my experience with that foundation stuff is that it really does not keep the weeds from growing. So I didn't bother.


The start of something good!


Almost there!


This is a picture of what was still on the path as we neared the end.
 I honestly wasn't sure what to do at this point but we decided to curve
the stack and keep it going even though it was much narrower
than the original path.


I ended up leaving it very simple by removing the old
 step stones, adding bricks as far as I could and filing with dirt. I am
 transplanting moss to this area, along with small hostas, to fill
it in and keep weeds from growing.
I


Used polymeric sand between the bricks to help solidify them and keep in place.


Sweep it into the cracks and then water it down with hose to 'seal'.


This is how it looks today. Only step left is for the hostas and moss to fill in the dirt areas. Will probably replace the 'wavy' edging as I hate it!


Joining up this week at:


I love the path and the history behind the bricks. I am a total historical geek.

Thanks for visiting!

#technisealezsand
#polymericsand


DIY Potting Table

Pin It So many projects in 2025 and I haven't posted in almost a year! Why? I have been so busy being retired and doing what I love! Bu...