
IT's Fun to be a Copycat!

When I saw this table at Pottery Barn, I fell in. love.
Quick photo taken with my phone that was hidden under my shirt!!
Well I certainly wasn't expecting to ever have my own Pottery Barn table like this, way out of my budget for sure. But, little did I know that one day...my hubby would come home with a BIG surprise. He found a cool old desk on the curb as he was dropping our kids off. The funniest part? He drove all the way home to describe it to me and ask if I wanted it. Really? Was that even necessary?

Bless his heart, he drove back to get it and it was still there, looking a bit worse for the wear but oh, the character!

Look at this beauty!

It actually sat in the middle of my kitchen for a couple of weeks and I was seriously tempted to keep it there. Never thought I really had room for a kitchen island but loved the extra counter space. But, it was a bit too short. So, I looked at it, and thought, looked at it, and thought and decided it would make a great coffee table. Time to get busy!

Chop go part of the legs, took the top off and started painting.

Chopped!

Table with no top
My hubby cut off about 2 inches down the side of the table top where there was a big gash, I sanded them and mixed a little leftover brown paint with clear glaze and water. Then, I simply painted the top with my mixture, let it set a minute, and wiped it back. Really let's the woodgrain show through! Painted the base of the table top with Heirloom White spray paint. Beautiful color! 

Love the rustic charm, even has a little warp in the tabletop.


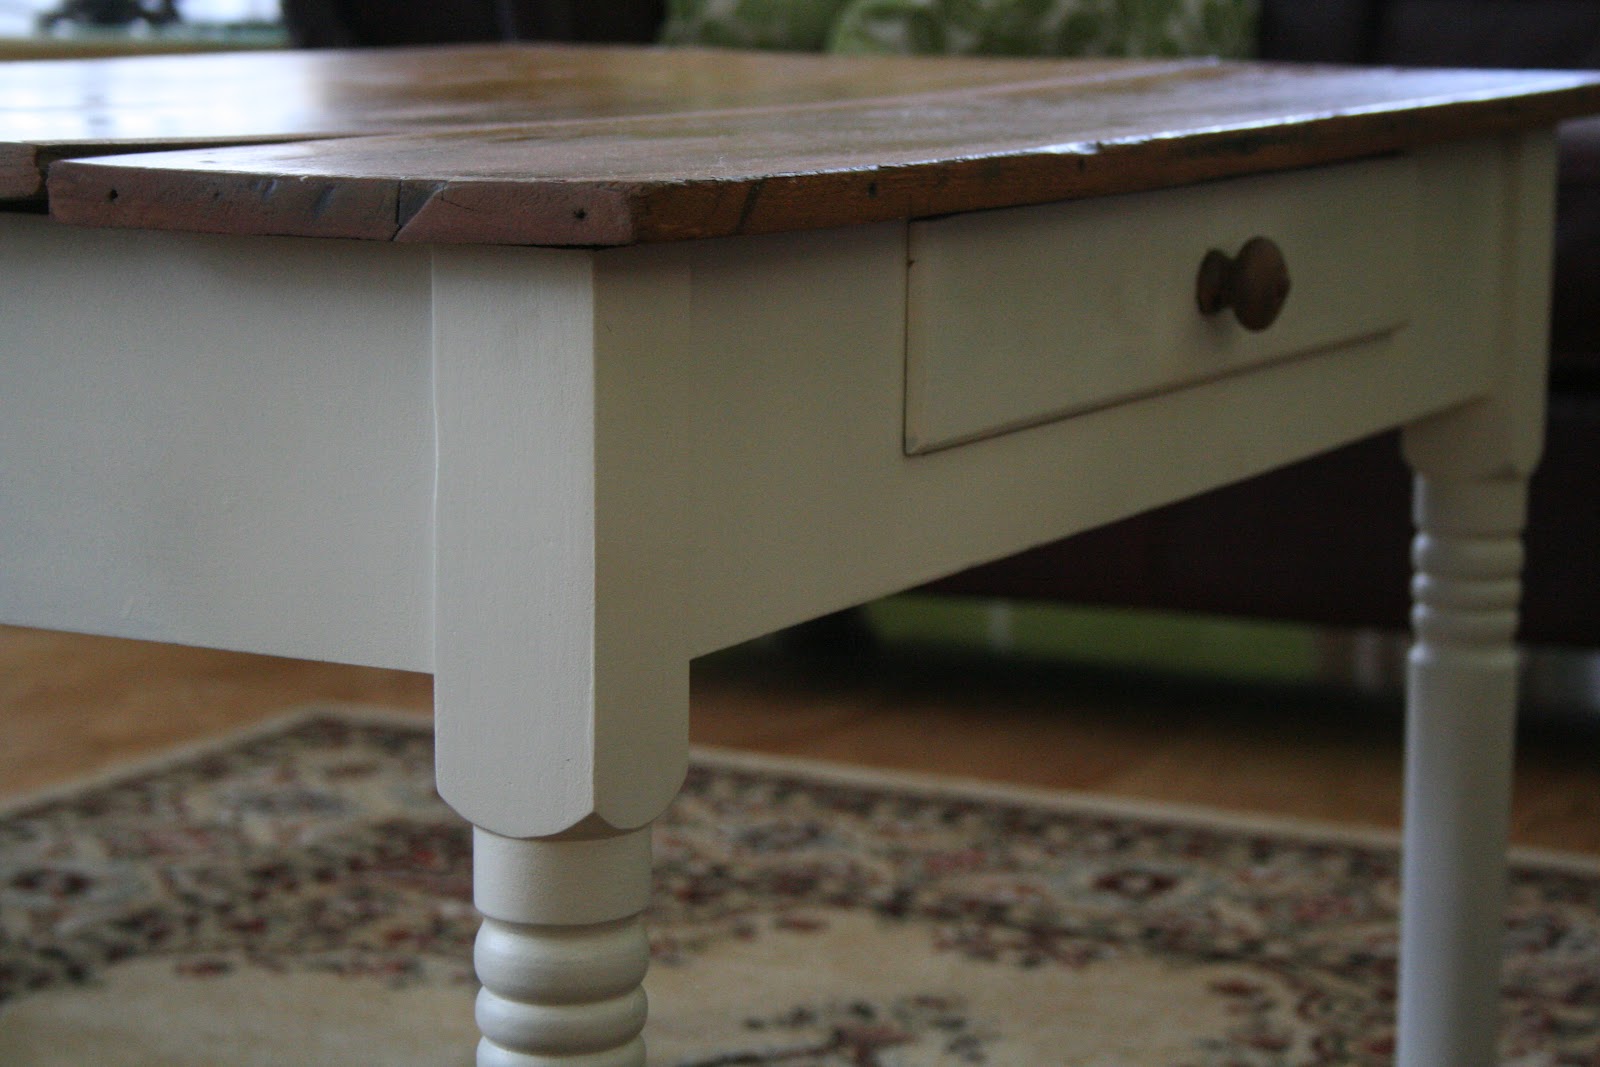
Up close and personal

My DIY Rescue a.k.a. Curbside Beauty

Hookin it up this week at:


Comments

  1. That is perfecto! What a sweet hubby..that he did that for you. I love the table. Thanks so much for sharing in the challenge. Enjoy!

    ReplyDelete
  2. makes a great coffee table and you did a beautiful job on the refinish.
    Blessings,
    Audrey Z. @ Timeless Treasures

    ReplyDelete
  3. I cant believe the great things that people throw away. You turned it into a beautiful coffee table.LOL at hiding your phone under your skirt.

    ReplyDelete
  4. Your table copycat turned out so well as a coffee table. It looks as good as the Pottery Barn one.

    ReplyDelete

Post a Comment

Thanks for visiting my nest. I love to hear from my visitors! Leave your comments here:

Popular posts from this blog

When your plan really isn't your plan after all.

I don't know about you but before I start a project, I start the vision for the project. Sometimes way before the project starts! But often, that vision changes multiple times before the project is finished. Heck sometimes I don't really even have a plan I just start painting or tearing out stuff and sometimes I just change my mind. But most times, it is because what I really want to do, for one reason or another, I can't. Take our basement bathroom for example. In this case I had a basic plan and everything that could go wrong, went wrong. As I was thinking about the bathroom I realized I hated it in the furnace room to begin with. I also hated the sauna and shower the previous owners had installed at the other end of the basement (which we never use). So I put plans in motion to get rid of the sauna. This would free up a big chunk of space and my plan was to make it a full bath at that end of the basement as it already had a shower. Several months later, and multiple fail...

DIY Kitchen Counter Beadboard Treatment

We have lived in our house for six years this month and every month of every year I have hated the back of this bar area! It is sooo blah and sooo oak  and sooo country looking. So, started researching what I wanted to do with it. First I tried to add the decorative wood corner pieces along with a decorative wood scrolly thing (real technical name, huh?) for the center. Did a cool paint treatment and really loved it, just threw some wood glue on and glued them up there. They lasted about six months. Every month or so another decorative piece would fall off until all I had left was one corner piece and the middle thing. I then tried a paper bag wallpaper treatment that really worked well and, of course, was real cheap. After applying the paper bag wallpaper I mixed some brown paint with water and antiqued it. Then, let that dry and antiqued it with a black glaze. Looked absolutely fantastic but as it started to dry the paper bags started lifting off the wall. So, I finally r...

A Quicker and Easier Way to Stepping Stones

Pin It This post came up in my memories feed from 2013 and as I was cleaning my yard up for Spring, I realized just how great these stepping stones still look six years later! So, yes I can still say: " However, my best project yet? Stepping stones. Now you might be wondering why this is such a big deal? I have wanted to put a stepping stone pathway from the gate to the backyard and back towards the patio/pool area for eight years. Eight looooong years. You wouldn't think this would be such hard thing to do now would you? But it was either the money (means about 15-20 stones which can get quite pricey), needing a truck or trailer to haul them, needing help to lift the suckers, or just life that got in the way."  Recently I read some articles about quick and easy stepping stones and it got me thinking that I could make that project quicker and easier by cutting a few corners. You won't believe how easy this was! 1. Buy a bag of Quikrete or regular ...