
Winter project #2 Yardstick Wall Art

Pin It

Several months ago, I bravely rescued several yardsticks from my father-in-laws house as we were cleaning up the estate. Why? Because they were cool. Isn't that a good enough reason?


Rulers cut and laid out


MDF cut out purchased for 2.99.


Dry fit.

I find I've been doing that more and more as I get older. Not 
sure if age has anything to do with it or that hoarding gene is rubbing off on me! Geesh, I hope not but seriously I couldn't pass these up they were just way too cool!

Painted with leftover grey paint.
Added silver leaf
.
To me, the coolest thing is the history they represent. Kresge Co., Augusta Lumber, and Alexander Elevator Co. All 
businesses that are no longer. I love historical houses and buildings so it was really a no brainer for me.
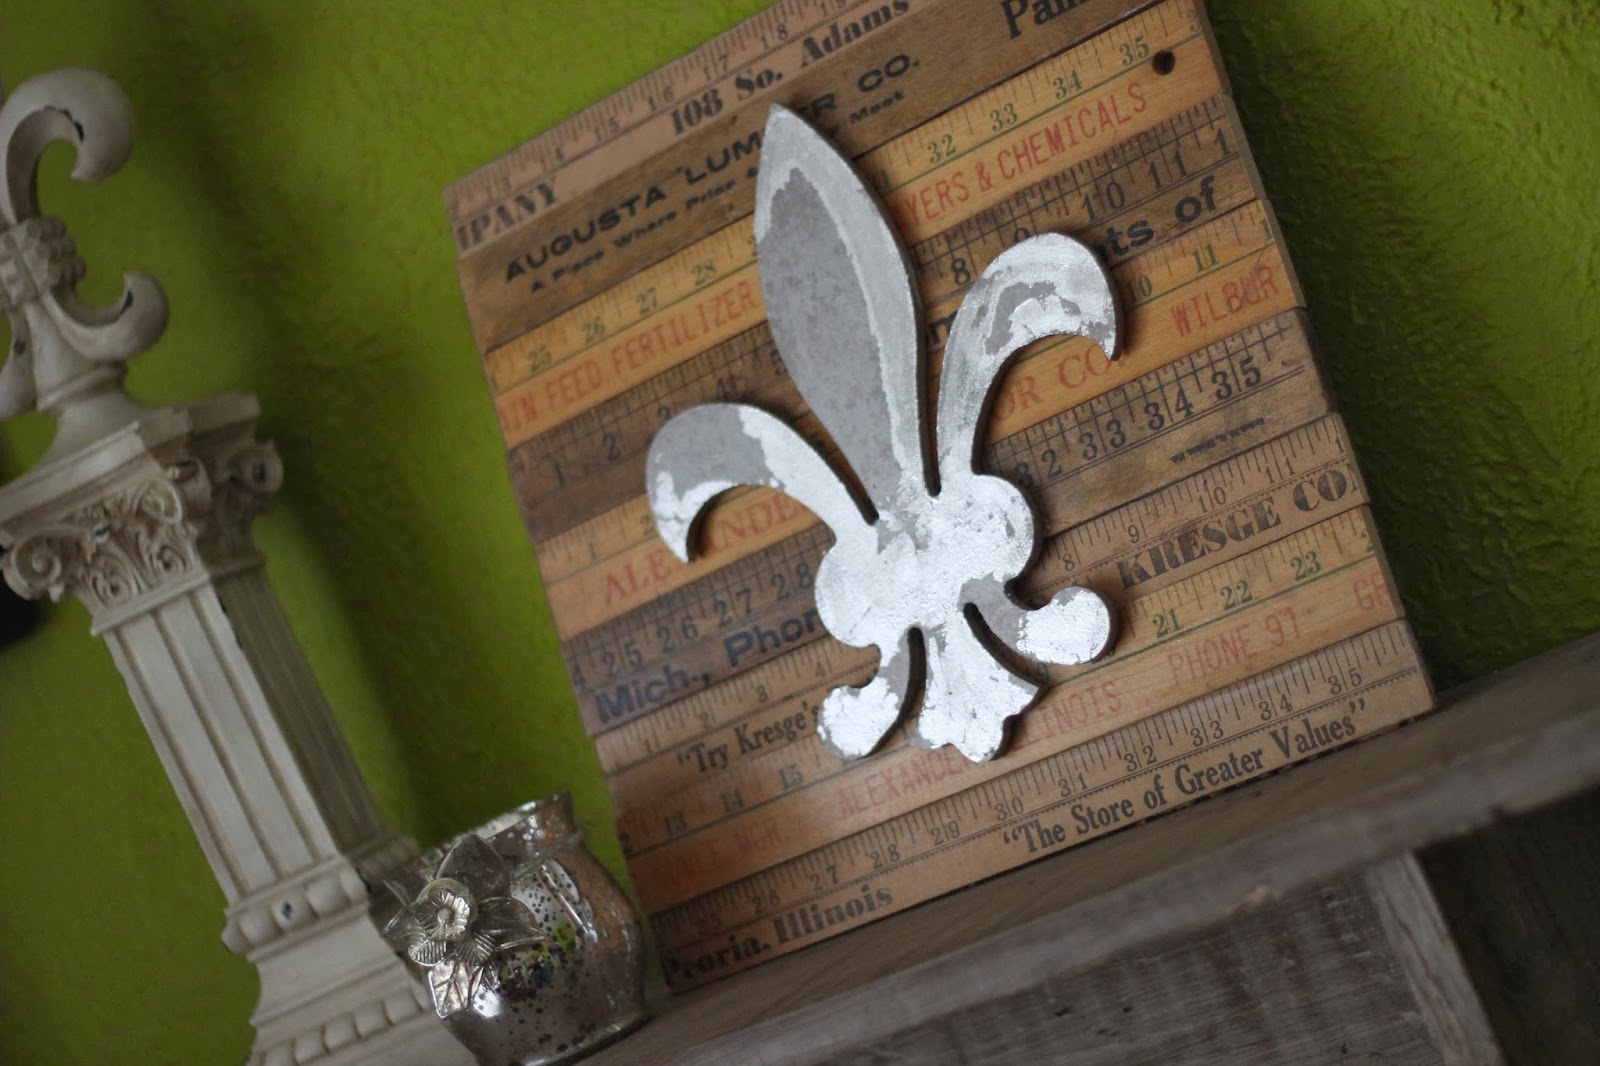

Rustic meets glam.
So as they sat in my basement for the past six months as I viewed all the cool yardstick Pinterest projects I wondered what to do with my measly 3 yardsticks. Not really enough to do anything much but I really wanted to use them in some way. So happy with how they turned out! Have you created any yardstick art?


I am linking to the following parties:
 Imparting Grace for Grace at Home
My Romantic Home for Show and Tell Fri
                                            French Country Cottage for Feathered Nest Friday
 The Thrifty Groove for Thrifty Things Fri 
Common Ground for Be Inspired Fri
The Charm of Home for Home Sweet Home ,
 Chic On A Shoestring Decorating for Flaunt It Fri
 Finding Fabulous for Frugalicious Fri
Rooted In Thyme; Sweet Fri
 Jennifer Rizzo for Fabulously Creative Linky Party
 Redoux Interiors Friday Party
 The Flying C for DIY Done Party
 Pieced Pastimes for Saturday Sparks Linky
Funky Junk Interiors for Party Junk
It's Overflowing for Overflowing with Creativity Sat. 
Be Different Act Normal for Show and Tell Sat.

Comments

  1. This comment has been removed by the author.

    ReplyDelete
  2. This is so pretty and I love what you did with it! The fleur de lis is a great addition. Thanks for sharing at TTF!

    ReplyDelete

Post a Comment

Thanks for visiting my nest. I love to hear from my visitors! Leave your comments here:

Popular posts from this blog

When your plan really isn't your plan after all.

I don't know about you but before I start a project, I start the vision for the project. Sometimes way before the project starts! But often, that vision changes multiple times before the project is finished. Heck sometimes I don't really even have a plan I just start painting or tearing out stuff and sometimes I just change my mind. But most times, it is because what I really want to do, for one reason or another, I can't. Take our basement bathroom for example. In this case I had a basic plan and everything that could go wrong, went wrong. As I was thinking about the bathroom I realized I hated it in the furnace room to begin with. I also hated the sauna and shower the previous owners had installed at the other end of the basement (which we never use). So I put plans in motion to get rid of the sauna. This would free up a big chunk of space and my plan was to make it a full bath at that end of the basement as it already had a shower. Several months later, and multiple fail...

DIY Kitchen Counter Beadboard Treatment

We have lived in our house for six years this month and every month of every year I have hated the back of this bar area! It is sooo blah and sooo oak  and sooo country looking. So, started researching what I wanted to do with it. First I tried to add the decorative wood corner pieces along with a decorative wood scrolly thing (real technical name, huh?) for the center. Did a cool paint treatment and really loved it, just threw some wood glue on and glued them up there. They lasted about six months. Every month or so another decorative piece would fall off until all I had left was one corner piece and the middle thing. I then tried a paper bag wallpaper treatment that really worked well and, of course, was real cheap. After applying the paper bag wallpaper I mixed some brown paint with water and antiqued it. Then, let that dry and antiqued it with a black glaze. Looked absolutely fantastic but as it started to dry the paper bags started lifting off the wall. So, I finally r...

A Quicker and Easier Way to Stepping Stones

Pin It This post came up in my memories feed from 2013 and as I was cleaning my yard up for Spring, I realized just how great these stepping stones still look six years later! So, yes I can still say: " However, my best project yet? Stepping stones. Now you might be wondering why this is such a big deal? I have wanted to put a stepping stone pathway from the gate to the backyard and back towards the patio/pool area for eight years. Eight looooong years. You wouldn't think this would be such hard thing to do now would you? But it was either the money (means about 15-20 stones which can get quite pricey), needing a truck or trailer to haul them, needing help to lift the suckers, or just life that got in the way."  Recently I read some articles about quick and easy stepping stones and it got me thinking that I could make that project quicker and easier by cutting a few corners. You won't believe how easy this was! 1. Buy a bag of Quikrete or regular ...