Thursday, December 15, 2011

Simply Christmas

Christmas is in the air, presents are wrapped. Lights are hung and tis the season to relax and enjoy! It sure has been hard to get into the Christmas spirit around these parts. No snow. Can you believe it? It was 50 degrees today on December 15 in Michigan. Geesh.
Bookshelf winter redo
A little bling for the cabinet.
Mind you, I do like snow but I don't L O V E snow. So, snow around Christmas and New Year's is great and then I am done. But seriously, nothing.
Fireplace mantel
Well, let's get movin' on to the 2011 Christmas Tour of Homes. Isn't it exciting?? On to the pictures. 
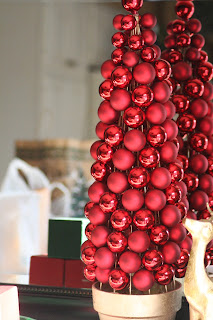
Red is my favorite Christmas color.
I just can't seem to get away from it.
Got this cute little lantern for $3, spray painted
it and added an ornament. Walah!


Ornaments are so cheap. These are all
Dollar Tree ornaments thrown into a
basket bought from Hobby Lobby on clearance.


A little rustic Christmas to the top of my linen
cupboard in the dining room.


Ornaments


What can you do with a plate charger for $1.99,
some dry moss, and Dollar Tree ornaments?


fireplace, mirror, wreath.


Love the reflections of mirrors.
They add so much light and space.


What's Christmas without reindeer? Oh, see the
little stand up plaque behind the reindeer?
$4. at a resale shop.
S W E E T!


Joy. Nuff said.


Lots of moss and ornaments this year.


Adding more bling with ornaments.


Linking up to the following Christmas Tours:


Saturday, October 15, 2011

Birthing new chairs...well almost!


My chairs after painting and reupholstering.
It's been awhile and I've been awol enjoying the end of the summer and the start of school which can only mean...F O O T B A L L! From August through November my life is football. And that means driving to all parts of the nearby country, working in the concession stand, freezing in the bleachers cheering for my kids. But alas, it also means that I am absent from the blog world for a season. However it doesn't mean that I have been absent from my projects, it just means that my projects are taking f o r eveh! 


Picture of the chairs that was on Craig's List
Well, I have finally...well almost finally....finished my kitchen chair project. We have been without chairs at our kitchen table for a couple of months now. Really hard to eat that way! You might be wondering why. It is not because I've been painting and repurposing chairs it's because I sold the chairs that went with the table. Something I've wanted to do for sometime. I finally got around to posting them on Craig's List to see what would happen. Yikes folks, they sold in less than 24 hours! Wasn't planning on that for sure. I didn't even know what I was going to do for new chairs!


So I started looking and the ones I LOVE are at Pier 1 for a price I have to refuse, cause I cannot pay that kind of money. But alas I found a great pair of old chairs off Craig's list for $10 for all 3 chairs. So minus the cost of about 5 cans of spray paint and a few yards of material and batting, the chairs cost about $45. to refinish and reupholster all three.


Isn't it funny how, just like birthing a baby, birthing repurposed furniture is soooo painful but as soon as you see the finished project you forget all the pain of the labor! This project sure had it's painful moments and anything that could go wrong did. From running out of paint, to having to strip down the old batting and bleaching the wood seat to get rid of a rather pungent (putrid!) smell that was permeating from these beauties! But, in the end, I am really happy with how they turned out. Hope you enjoy them too!


Linking up this week to:
Redoux

Weekend Wrapup Party at Tater Tots and Jello

Between Naps on the Porch
Amaze Me Monday at Dittle Dattle
Potpourri Friday at 2805


The Girl Creative


Saturday, September 17, 2011

From Junk to Treasure

This project is a combination of a couple of repurposed items. The black decorative element over the chalkboard frame is the top of an old mirror that came off of a dresser and the frame used to hang for years on a wall at my hubby's grandma's house. It was dark walnut brown with picture of a fruit basket. The project below is a great example of reusing and recycling to end up with a great wall vignette.


It started with the frame you see below. When we were clearing out Jack's grandmas house, I quickly grabbed up this find. It was not much to speak of (wish I had pictures) but once I pulled out the print  and gave it a paint treatment it was great in my dining room. Originally there were 2 similar types of frames/print although not a match. I gave them the same paint treatment (the dining room wall color as a base coat with a white crackle finish over the top) and hung both together as empty frames. G R E A T conversation piece. Nobody could understand why I would just hang a couple of empty frames but everybody liked it!


That's been several years ago and they have gone through many transitions since then. One is no longer as the frame broke and was unrepairable. Alas, the lone frame is now a victim of one final update as seen below.


This is the frame. It has been painted and spray painted and crackled to end up like this.


This is a scrap piece of plywood that has been used for a school project by my youngest son, cut and now reused as the background board for the frame.


Added some lovely chalkboard paint. Did have to go out and buy another can. Had a can for a few years just waiting for a project and couldn't find it...argh!


Mounted the board in the frame. This is what the back looks like, you can see the original dark brown finish of the frame.


All in all, this project only cost me $10 for the chalkboard paint.


Linking this project up to:
Funky Junk Interiors SNS #99
A Potpourri of Life at 2805
Tatertpts and Jello
Redoux


Saturday, August 13, 2011

I'm Almost There...

Well, that really isn't true because if I've learned anything about myself over the years is that I like to change things up. It makes life interesting, keeps me smiling, and drives my husband crazy! But he loves me and he helps me out all the time with my little projects. God bless him.

Well, the kitchen project was a biggie. Small renovation in the big picture but a huge transformation. There are still many things I would like to change. In a dream world, if money were no object, I would replace my cupboards, remove the counter bar area and put in an island. I would add quartz countertops, rewire above the sink for more lighting, replace my refrigerator. Dare I go on?

But alas, this is not to be. So, I was able to change up my kitchen a whole lot and brighten it. You can see some of the before shots in this post, and the renovation shots here. Folks, we had oak. Now I like oak. really. Okay, not so much. Let me rephrase, I used to like oak a  w h o l e  bunch but I guess this is one of the things that has changed over the years.

I know many of you would 'decorate' much more than I have. With knick knacks and pretty dishes. I would love to but the reality of my life is that it very rarely even looks this clean. I mean come on, I have three high school boys that never stop eating! But I know that someday. in the not to distant future, I will miss the mess.

So, I am learning to be grateful. Grateful that there are so many wonderful decorating blogs out there where I can steal ideas and get inspiration. Grateful for paint. Paint is an amazing creation, it can change your world for a small price! Grateful that my oak cabinets could be painted, knobs added, and it looks like a whole new kitchen. And somewhere down the road, I will have a perfectly decorated kitchen with everything in it's place and clean all the time. But then, my boys would be gone, wouldn't they? So for now, I am enjoying the journey. I hope you enjoy!


Cabinets/counter top before.
Another before shot.


Linking up this week to:

Show and Tell Friday at My Romantic Home

Today's Thrifty Treasures at Southern Hospitality

Power of Paint Party at Domestically Speaking

Transformation Thursday at The Shabby Creek Cottage
Strut your Stuff Thursday at Somewhat Simple


Monday, July 25, 2011

For the birds...

Inspired by Thrifty Decor Chick's "making something from nothing" July extravaganza, I started searching through the house and the shed and all over to see what kind of goodies I had laying around. I found a beauty in my pool house and something I had TOTALLY forgotten about buying. Bursting with excitement, I pulled it off the top shelf only to find the whole inside was plugged full of some kind of soft white, fluffy stuff. Finally dawned on me that was what happened to the stuffing from one of my lawn chair cushions that I found chewed up this past winter! Some critter was busy...and smart!
Anywhoooo, I had my husband pull it all out. Yes, I am a bit of a chicken when it comes to mice. I have had my share of rodents this Spring and Summer. I had already found a dead, dehydrated mouse when cleaning out the motor of my garage freezer. Oh, and let's not forget the bunny nest I uncovered when demulching my landscaping beds. Could hear me screaming for blocks!

Well, back to the makeover. I bought this birdhouse about 3 years ago for a couple of bucks and never knew what I wanted to do with it. I could feel the wheels start to churning as I kept looking around our property. Found a couple of old fence posts back in the shed and knew what I was going to do.
So I found some old beige paint and watered it down, after spraying a couple of coats of white from some old spray paint I had. Then I did a wash with the watered down beige paint. Found a piece of board, to mount the house to the pole. But first, I dug the hole, mixed quikcrete to mount the post down in the hole and let it stand overnight. The end result was a nice, aged birdhouse that looks like it's been there for years. Exactly what I wanted!


Hooking up this week with:


HOG

Between Naps on the Porch Metamorphosis Monday
Trash to Treasure Tuesday at Reinvented
Nifty Thrifty Tuesdays at Coastal Charm
Garden Linky Party at Centsational Girl


Sunday, June 5, 2011

A Pop of Orange!

I have a very strange front entry. Now I am not an architect and maybe I couldn't have done it better but really. For one thing it's big. Now you might not think big is bad but in this case big is wasted. Because other than a walk-thru (walking through on the way to the 2nd story or on the way in from the front door) that is it's only use. It has a closet that juts out and transitions into the living room with these stupid half walls. I might add, that these walls have had these ugly spindle posts that make it look like a jail cell!


Anyway, I'm digressing. I have been on a walk-thru journey with this entry trying to get it the way I want and I am finally 85% there! Yeah! On this journey I have had the walls many colors which has been challenging because all the walls connect to other walls in other rooms and on and on. Well, I did it. I finally found a color that I L.O.V.E.. Orange. Yes, orange.


Here is the front door/closet area.
Dark and ugly.
This is my front door now after lots of painting.
Did I mention how much I love color? Oh, did I also mention how much I LOVE dark, bold, bright colors. Although I must say that I have been pretty inspired by the trend towards white/cream/beige neutrals I have found myself leaning a little towards doing an all neutral room using different shades of beige/browns with lots of different textures and surfaces. WOW, that scares me! I'm not sure what is happening to me. Pretty crazy!


I started this last Fall by painting all that dark trim! Yikes, what a job. Then, I yanked off the closet doors because I absolutely H A T E them! Okay, maybe hate is not a strong enough word. So, off they went but now, what to do? We lived closet door-less for almost a year folks! Let me tell you, if you know the condition of my closets...'nuff said. I just didn't know what to do and so we lived with it. It took me long enough to figure out a color. This color had to look good with my living room green and my stairway capuccino and my kitchen and my dining room and...


Well anyway, you get the idea. So after lots of painting, installing new closet doors, adding a curtain treatment to the side panel windows, painting the door and even changing the lock on the door to get rid of the brass...yuch!
This is the front part of the entry.
 There is virtually no natural light in this space.


You can get an idea how big the area is.


This was my roadside mirror find. Brassy gold color frame.
Spray painted a white and glazed it with white pickling glaze.
Love the frame!

Hooking up to Funky Junk Interiors SNS Party.


UndertheTableandDreaming